I’ve always wanted to collect my own rainwater, I think if you have a garden, to waste the rainwater runoff from your roof almost seems a sin. Obviously the amount of water you going to get from your roof will depend on a few factors, the most important being:
• Amount of roof area
• The percentage of this roof that you can that you can manage to drain into a tank
• The amount and intensity of the rainfall
• Seasonal variation in rainfall
To make it simple you can take your annual rainfall and simply multiply it by the area of the roof, in my case that is a annual rainfall of 624 mm or 0.624 m – multiplied by the roof area (approximately 250 m^2) which gives about 156 m^3 per year. Now 1 m^3 is 1000 litres, so that’s a lot of potential water, problem is if you tend to get all your rainfall in a couple of months of the year, then finding a big enough tank to store it will be problematic.
We are fortunate that Port Elizabeth, rainfall is very nicely spread over the year, so it makes a capture system ideal as the tanks don’t have to massive to capture all the available water.
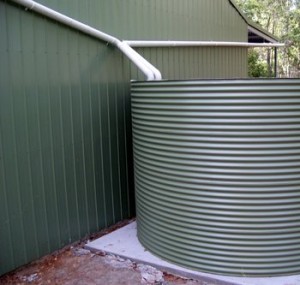
The next problem I faced was where to put the tanks (I chose 2 x 2500 litre tanks which are quite large, 2.5 m high – you will see why later) and also how to get the water from the gutter into the tanks. A pet hate of mine is big tanks that dominate the garden and even worse a skyhook arrangement of pipes to get the water into the tank.

In your face piping
So I decided that one option was to bury the tanks (at least partially) and put them under our deck. This has the advantage that they are out of site and also piping the water into the tanks can also be underground, also out of site. It does have the obvious disadvantage that you need to pump the water to get it out, but since I needed pressure anyway this was no issue to me.
How do you bury a tank that isn’t meant to be buried? Well the obvious answer is you shouldn’t try unless you prepared to take the risk and you should get ones that can be buried (quite pricey). So huge disclaimer here – this is what I did, it may not work for you! I dug the hole for the tank about 400 mm bigger than it needed to be – placed the tank in the hole and then filled it with water.
Then once the tank was full, I backfilled around the tank with a dry mixture of sand and cement – ratio about 5:1. I did this in layers and then with water, saturated the mixture each time. I repeated this until I reached ground level. Now the important part, leave the water in the tanks for at least 3 weeks to give the cement time to harden. If done correctly should end up with a lovely compression ring round your tank. I suspect this will only work in good stable soils, if your ground is very clayey and saturated you probably going to come to grief. Also remember if you have a high water table your tanks are simply going to float if empty! It is also better if they stick partially out the ground, as this saves on trying to make a stable roof for your setup.
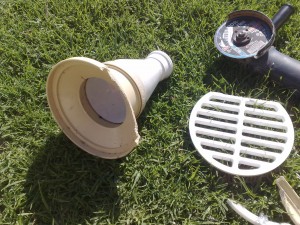
With the tanks in the ground (see pic) all that was left was connecting it up to the down pipes. Now normally people manage to get one or maybe 2 of their downpipes into the tank, but this leaves a lot of the water going to waste as most houses have more downpipes than this. So I came up with a semi pressure system to pipe the water over longer distances but keeping it neat. I used 50mm (2″) PVC plumbing piping and modified some 110mm gully fittings to make a capture system. As it can handle some pressure you can simply mount the head at about the same level as the top of the tank and run the line at or below ground level. Even if visible it is much neater than down pipes hanging in mid air.
Here are some pics of the capture system with one of the semi buried tanks to the left:

Modifying the gulley so it sits closer to the wall

Close up of modified gulley

Capture system with tank to the left
Ulitimately the idea is the tanks and most of the piping will be under the deck and hidden (see sketch-up pic below):

Deck layout - sketchup


